Showing posts with label DIY. Show all posts

Thursday, April 14, 2011

How to Repair High Gloss Laminate Flooring Scrapes and Scuffs

Laminate flooring is enjoying unprecedented popularity because of its exceptional ability to resist fading, staining, and deterioration due to normal wear and tear. When you add affordable prices and easy DIY installation to the mix, the result is a winning combination that is irresistible to consumers.
As great as today's high gloss laminate products are, however, they are not completely impervious to all minor damage. Over time, you might start to notice some scrapes and scuffs spoiling your floor's appearance, chiefly in areas that are frequented by pets and small children.

Fortunately, you don't have to pull up the blemished planks and replace them with new ones. Instead, you can repair high gloss laminate on your own using the following everyday items that you probably already have on hand.
  • Pencil eraser. Skid marks left on laminate flooring by certain types of shoes and toys can often be removed by rubbing a pencil eraser over the area using gentle, circular strokes. In lieu of an eraser, you can use the rubber sole of a tennis shoe for the same purpose.
  • WD-40. While most folks are aware of the lubricating properties of WD-40, not many realize that it is also a terrific household cleaner. To remove scuffs from your high gloss laminate, apply a bit of WD-40 to a soft cloth and lightly scrub until the marks disappear. Be sure to wipe up the lubricant residue with a wet rag to prevent any potential slip-and-fall accidents.
  • Baking soda. Baking soda is celebrated for having a multitude of uses, so it should come as no surprise that it helps remove scrapes and scuffs from laminate flooring. Mix a couple tablespoons of baking soda with some warm water until you end up with a pasty substance. Next, use a cloth to dab paste onto the scuff marks and rub them away.
  • Toothpaste. If you don't have any baking soda at home, there's no need to run to the store. You can often get the same effect by using plain toothpaste to touch up your floor.
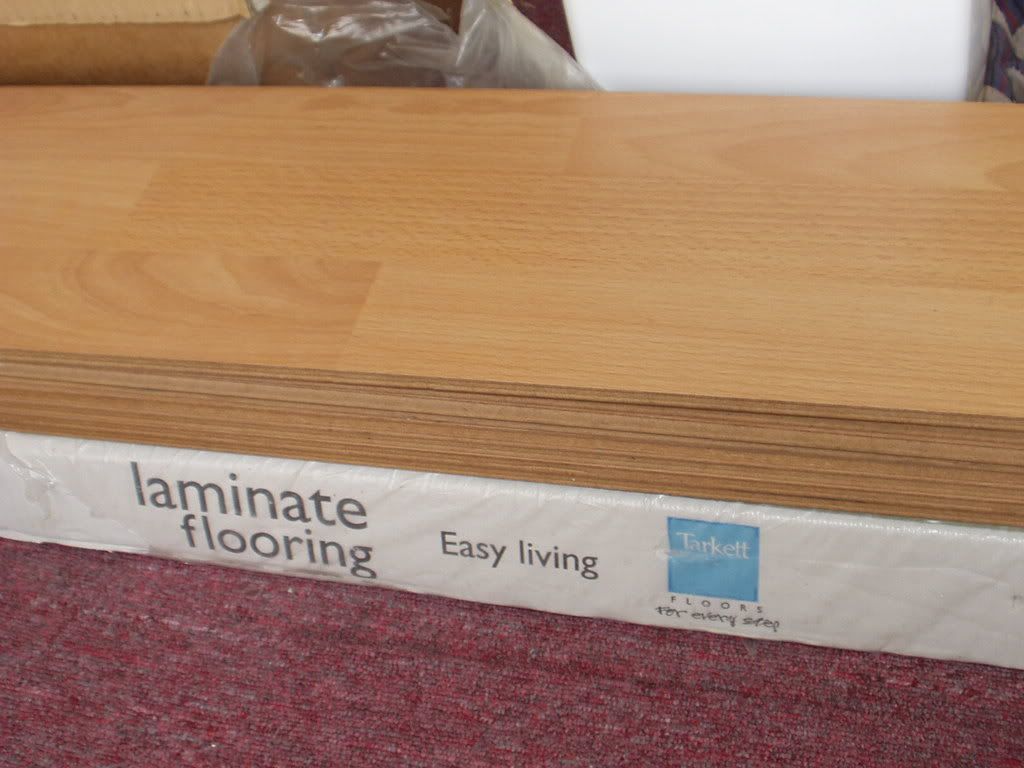
The methods listed above work best on light scuffs, scrapes, and skid marks. For deeper, more stubborn blemishes in your laminate flooring, you might have to turn to commercial cleaning products to get the job done. Many manufacturers now make nonabrasive cleansers especially for high gloss laminate, so you don't have to worry about damaging the finish.
Don't let minor scuffs and scrapes turn your floor into an unattractive mess. Instead, you can restore its natural beauty in no time by treating the problem using these simple solutions!

Stephanie Elman is a writer for Best Laminate, a leading provider of laminate flooring. Modern high gloss laminate flooring snaps into place for years of durable beauty.
See another post

Save Money and Nature With DIY Solar Kits

The rising power demands and pollution that comes have been a matter of concern for environmentalists for quite some time now. Pollution produced by power stations has been the root cause of number environmental and healthcare issues such as global warming, depletion of the ozone, physical ailments, and many more. To add to the downside, rising power prices are becoming difficult for people to manage within their budget. All these factors point towards the need of switching to a cleaner and more cost-efficient method of power generation.
When we talk of clean sources of power, nothing compares to what is delivered by renewable sources of energy such as solar and wind. The power produced by using renewable sources of energy can be used to perform a number of appliances involved in daily living such as fans, lanterns, water heater, etc. The main benefit of using solar powered devices is that they don't produce any harmful wastes like conventional methods of generating power.

As the energy used for generating power is free, there is virtually no cost of power generation and all you need to take care of is a nominal maintenance cost. Switching to devices using renewable sources of energy is sure to cut a huge figure from your power bills while preserving our dear planet. Thanks to innovations in this field during the last couple of decades, you can choose from a number of options such as solar power panels, wind power generator, solar water heater, solar lantern, solar fans, and many more.
To avail even more savings, you can opt for DIY solar kits and save on the installation cost of these devices. These kits come with a detailed yet easy to understand instruction manual to assist users in setting up the device. With some basic tools and a working knowledge of how to handle them, you can save a great amount of money by doing the installation by yourself. Owing to the popularity gained by these cost-efficient DIY solar kits, most stores dedicated to renewable energy offer these kits.
If you are planning to buy a solar kit for your home, you can use the web to find online stores offering these kits. Online stores offer the best way to buy such products as you can compare the prices as well as read customer reviews about different devices and stores before making your final choice of both.

The author is an experienced Content writer and publisher on the topics related to DIY solar and solar powered.
See another post

Thursday, February 24, 2011

DIY Projects You Will Love (Part 3)

How to make goblet votives

Make glowing goblets

Turn old goblets and trophies into sparkling candle holders. First, clean them well with with metal polish and a clean cloth. Fill with Microwaveable Soy Wax for Containers (by Yaley; $6.99 for 1 lb.; from joann.com).

Add a Pre-Waxed Medium Bleached Wick with Wick Clip (by Yaley; $2.99 for six; from joann.com) to make elegant, long-burning votives.


More:  Get our step-by-step instructions

Patterned gift wrap

Hand-printed gift wrap

With simple cookie cutters and paint, you can make your own distinctive wrapping paper.

Just dip the cutting edge of a cookie cutter (we used snowflakes and scalloped circles) into white heavy body acrylic paint (sold at art stores in 4-oz. tubs).

Stamp the cookie cutter onto a sheet of colorful paper, starting at a top corner. Create your own patterns by either joining or overlapping the shapes.

If the paint is too thick or lumpy, add a few drops of water and stir gently until thinned and smooth.

Leaf prints project

Easy fall decorating: DIY art from autumn leaves

Instant leaf prints

Bring nature's magic indoors with this simple project: Just gather a few of your favorite leaves or flowers, flatten them under a book, then copy them with a color photocopier.

Glue prints to canvas-covered boards (about $2 in art supply stores). Glue a small inexpensive wood frame to the back to act as hanger; it also sets off your print from the wall.

More:  How to make a leaf print

How to transform a chair

Transform a chair

Turn a drab thrift-store chair into a stylish accent for any room in your home. All it takes is some paint, fabric, basic supplies, and a free weekend. Take advantage of your resale shops, you will
find styles you like even in accessories, paint is not expensive!!

To start, choose a chair with no missing screws or loose legs; it should have interesting features or frame detail.

Or turn 2 or more chairs into an eclectic set. Look for designs that have a wooden frame and an upholstered seat and unify them with the same color and fabric.

More:  How to transform a chair

Etched jar

Etch glass

There is something magical about etching glass ― the process turns plain glass pieces into decorative objects in minutes.

The secret is etching cream. You simply apply it to the glass, and the surface turns into a translucent white. The results are beautiful, subtle, and lasting.

More: How to etch glass

I found it on Craigslist!c

Reinvent thrift store candlesticks

Turn mismatched candlesticks into a fresh new set by painting them an unexpected color (in this case, high-gloss indigo).

1. Remove any wax residue with paint thinner and a clean cloth.

2. Mist one coat of spray paint primer for metal onto the candlesticks, holding the can 10 to 12 inches away. Cover evenly with paint.

3. Once dry, spray two light coats of spray paint for metal. Hold the can at a distance to avoid drips. Cover the detail grooves evenly.

We used: Rust-Oleum Painter’s Touch sandable spray primer in white and Rust-Oleum Painter’s Touch gloss spray paint in navy blue.

Tuesday, February 22, 2011

DIY Projects You Will Love (Part 2)

Easy fall candle project

Nature's stained glass

Chinese pistache leaves are translucent enough to glow like stained glass when lit from behind. To celebrate their vivid fall beauty indoors, display them on simple glass hurricane candle holders.

Gather leaf cuttings from your garden (ginkgo and Japanese maple are other good choices).

Press them in a book overnight to keep them from crinkling, then use one or two Glue Dots on the back of each stem, affixing each leaflet to the outside surface of the glass.

CD jewel cases become grid of frames

Turn CD cases into frames

Castoff CD cases are the perfect size for creating a quilt-like grid collection of landscape photos.

From the book Photocraft: Cool Things to Do with the Pictures You Love: Scan or crop your images to the size of a CD case (5 3/8 in. wide by 4 5/8 in. high) then print on good photopaper and trim. We recommend using standard (not slim) cases. Discard plastic inserts.

Back each photo with cardboard or foam board and snap the cases shut. Attach them to the wall with 3-inch strips of sticky-back hood-and-loop fasteners (such as Velcro).
Picture frame becomes memory box

DIY decorating projects

Make a memory box table

Turn a deep photo frame and similar-sized side table into a venue for celebrating treasured keepsakes.

More: How to make this memory box table
Flower shop easy style

Make your own designer bouquet

Treat yourself to colorful bouquets and arrangements from a mini flower studio you can create at home.

All you need is a sink, a little counter space, and a few essential tools. See what you can do with a single bloom, and how to turn just about any vintage vessel into a vase. (Tip #1: Start with the freshest flowers you can find.)

More: Flower shop secrets

Drawer organizer becomes bento-box guest tray

Turn a drawer organizer into a bento-box guest tray  

Tuck a drawer organizer into a storage tote with some thoughtful amenities to make your houseguests feel like royalty. (Be forewarned: They’ll be eager for a return invite.)

How-to: Slip a drawer organizer into a fabric-covered box or other storage tote and stock it with a few travel-size essentials in coordinating materials and hues. Tie a washcloth with colorful string; wrap a bar of soap with wide ribbon; use letter stamps and a label sticker to personalize a scented candle.

Easy craft table

DIY workspace

To create your own instant workspace anywhere, put a flat birch hollow-core door atop two adjustable sawhorses.

Cover the door with self-healing vinyl board cover (available from art and drafting supply stores). The closer you can get the board cover to the exact size of your door, the better.

Stencil a basic measuring system onto the board cover, and you'll never need to hunt down a measuring stick.

Time: Four hours plus drying time

Cost: About $175


Sunday, February 20, 2011

DIY Projects You Will Love

How to make a wall vase

DIY: Fun weekend crafts and home projects

Shadowbox wall vase

Turn a shadow-box frame into a vessel for your favorite things from the garden or flower shop.

Flowers or cuttings ― such as these leucadendron blooms ― extend through the opening of a picture mat to create an organic work of 3-dimensional art.

Group two or three frames on the wall or use one for a tabletop display. Change the background and cuttings for a new look any time you like.

More:  How to make a shadowbox vase

Twigs tablescape

Tabletop twigscape

Create a mini forest for your table from elegant branches and twigs.

Here, tree-like twigs edge a stream bed of green pebbles running down the center of a sealed 30-inch piece of redwood.

More:  Make tabletop forests

How to decorate glassware with paint

Painted party glassware

Perk up your table by turning ordinary wine goblets into stylish geometric art glass. It just takes a little glass paint and a stencil or template.

Designer Sarah Caska used a fine-tip black permanent marker and enamel paint formulated for glass to create these Frank Lloyd Wright-inspired designs. The cost was about $36 for 8 decorated glasses, including stemware.

More: How to paint glassware

how to make a faux roman shade

Fake a Roman shade

In rooms where privacy isn't important, you can give windows all the dressing they need with shorter faux Roman shades. This is a budget friendly project from DIY.

They aren't full-length, so these tricksters require far less fabric than the real McCoy and can often be made from inexpensive remnants.

More: How to fake a Roman shade

Personalized river rock paperweights

Make a personalized paperweight

Turn smooth river rocks into a stylish paperweight with white rub-on transfers. Or turn it into refrigerator art by adding a small magnet to the back.

More:  DIY monogrammed paperweight

Flower lampshade design

Artful lampshade

A plain lampshade becomes instant art when you add a paper design to the inside lining. I LOVE
this affect!!!! What a break from the boring plain shade!!

The design remains invisible until you turn on the light. Click here for our template.

More:  Make an artful lampshade

Related Posts Plugin for WordPress, Blogger...
Twitter Delicious Facebook Digg Stumbleupon Favorites More

 
Design by Free WordPress Themes | Bloggerized by Lasantha - Premium Blogger Themes | 100 Web Hosting